Django REST Framework - 1. Dockerize Your Project
A step-by-step guide to set up Django Rest Framework Project with Docker and Github.


Django projects not only depend on Python requirements but also many system requirements, such as a web server, database, operating system, etc. When developing a Django project, you need to ensure that all environments and all developers will have all the same requirements installed. One way to keep those dependencies in sync is to use Docker. With Docker, we can have different versions of the database, web, or other servers required individually for each project. To learn more about docker, you can refer Explore Docker.
What you’ll learn:
- How to set up Django Rest Framework with Docker and GitHub.
- How to use docker and docker-compose.
- Create a project and set your app running.
- Basic git commands.
Let's get started...
Set up a new GitHub Project
Before you get started, make sure you have a GitHub account and SSH authentication between your computer and GitHub.
Log in to your GitHub, Now create a new repository of your choice, and clone the project to your system. Once you clone your project, Open your project in your favorite IDE.
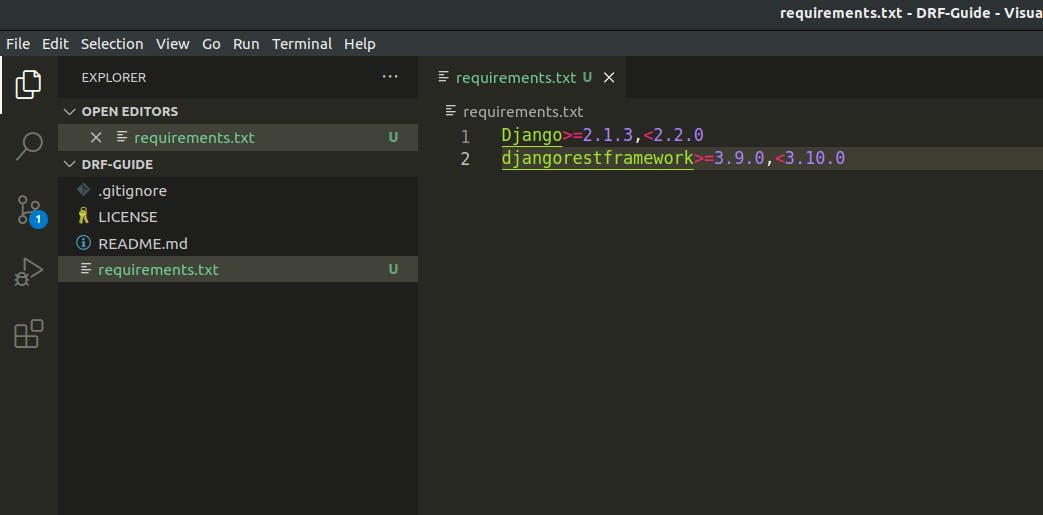
Add Requirements file
Create a new file, called requirements.txt, as shown below. It is used for specifying what python packages are required to run the project.
Create a Dockerfile
Now that we have created our project on GitHub and cloned it to our local machine, we can go ahead and create a docker file.
A Dockerfile is simply a file that contains a list of instructions or dependencies for Docker to build a docker image. Now let's create our Dockerfile. Simply create a new file at the root of our project called "Dockerfile". The file needs to begin with capital D and doesn't have any extension at the end.
The first line of the Dockerfile is the image, that you are going to inherit from your Dockerfile. So basically with Docker, you can build images on top of other images.
We are going to create our Dockerfile with Python 3.7 image. You can visit https://hub.docker.com to find a list of available images. There are various images available Images, the one we are going to use is alpine3.7
Create an empty folder called app, because this will be required by our Dockerfile, and enter the commands as shown below.
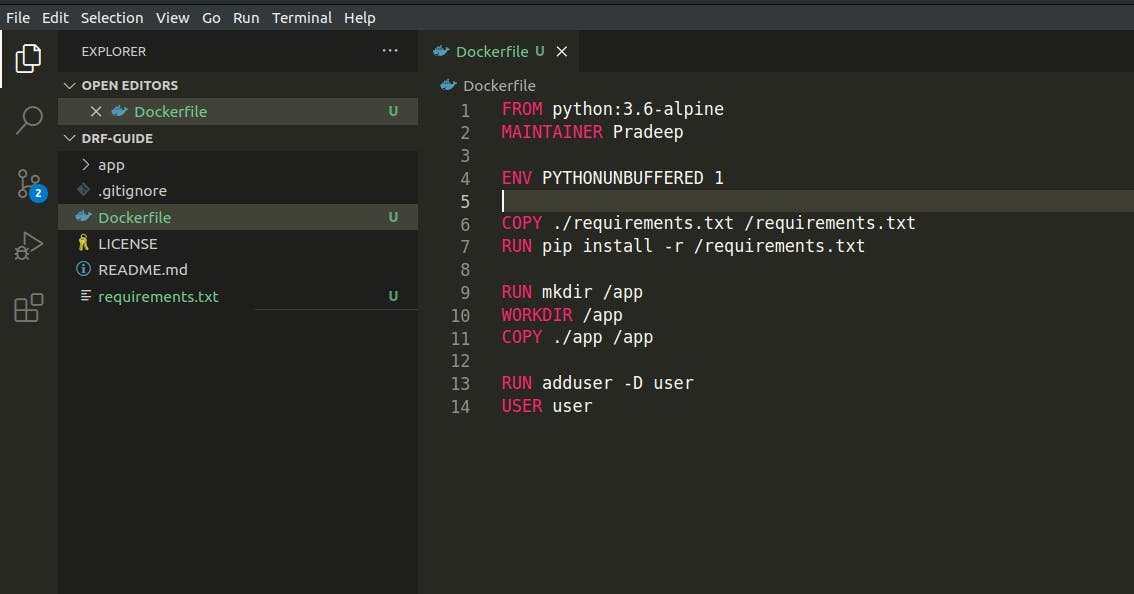 We'll go through the above commands one by one.
- FROM python:3.6-alpine - This is the Python image that we are going to inherit from our Dockerfile. Alpine image is a very lightweight and minimal image that runs Python.
- MAINTAINER Pradeep - This is optional, but it is used to know who is maintaining the project.
- ENV PYTHONUNBUFFERED 1 - This is recommended when running Python in docker containers. The reason for this is that it doesn't allow python to buffer the outputs. It just prints them directly, and this avoids any complications when running Python applications.
- COPY ./requirements.txt /requirements.txt - Copy our local requirements JSON, to our docker image.
- RUN pip install -r /requirements.txt - This will install our requirements from a .txt file using PIP.
- RUN mkdir /app - This creates an empty directory within our docker image to store our application's source code.
- WORKDIR /app - Switches to the default directory, unless we specify otherwise.
- COPY ./app /app - Copy the app folder from our local machine to our image, which consists of our project code.
- RUN adduser -D user - This will create a user that's gonna run our application on Docker. For security purposes, if we don't do this, then the image will run our application with a root account. If somebody compromises our application, they can get root access, which is very dangerous.
- USER user - Switch to that user.
Docker Compose Configuration
Docker-compose is a tool that allows us to run our docker images and manage services configuration (e.g. Postgres Service, Redis Service) for our project.
Create a new file named "docker-compose.yml" on the root of your project and enter the commands as shown below. This is a .yml file that contains the configuration of all the services that make up our project.
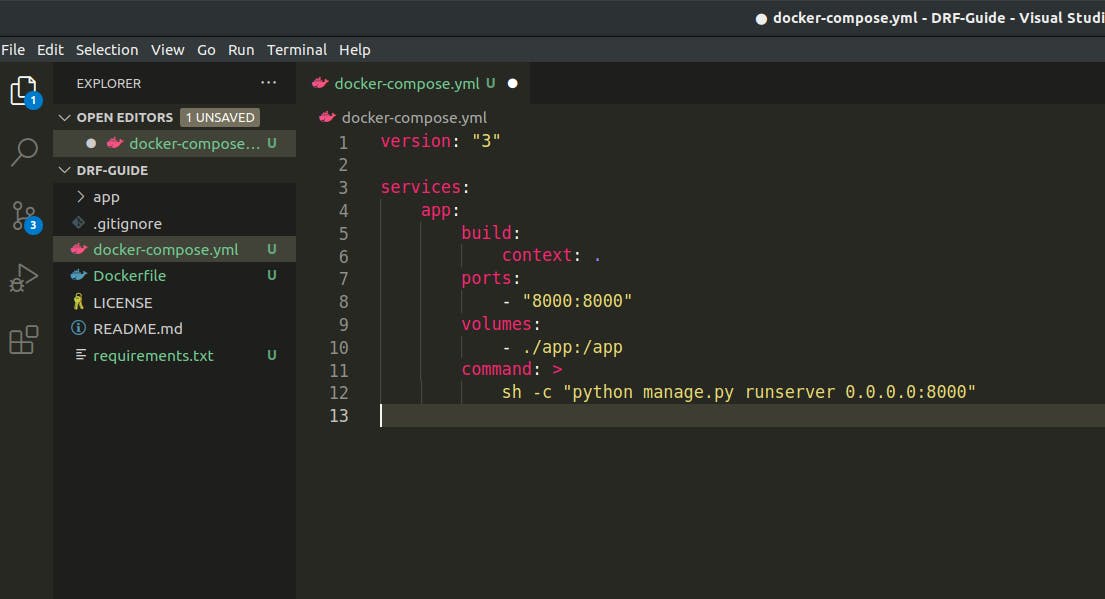
- version: "3" - Version of the docker compose.
services: - Services that make up our project. Right now we only need one service for our python Django application.
app: - Service called app
- build: - Build section of the configuration.
- context: . - We are sending context to "." which is our current directory.
- ports:
- -"8000:8000" - Map our project on port 8000 on our host to 8000 on the image.
- volumes: - Whenever you change something in your project, it automatically updates changes in the container in Real-Time, so you don't need to restart the containers to reflect the changes.
- ./app/app - Maps app directory of our project to app the directory in our docker image.
command: > - Command that is used to run our application on our docker container.
- sh -c "python manage.py runserver 0.0.0.0:8000" - shell command to run our application. This will start our development server on port 8000, available on all IP Address's that run on the container.
- build: - Build section of the configuration.
Build Your Project:
Once you are done, we will build our project. To do this, go to your terminal and run "docker-compose build". This will build our image using the docker-compose configuration as shown below.
 deep@Latitude-5590:~/Desktop/DRF/DRF-Guide$ docker-compose build
 Building app
 Step 1/10 : FROM python:3.6-alpine
 3.6-alpine: Pulling from library/python
 a0d0a0d46f8b: Pull complete
 c11246b421be: Pull complete
 ef6741e6e9c4: Pull complete
 9d6fa827d5ce: Pull complete
 4fbd2be606d8: Pull complete
 Digest: sha256:410328ff242994d24bbea32cb0ddc4c4ffda5a7a4f6e2d2f29e6821cd6d85daf
 Status: Downloaded newer image for python:3.6-alpine
 ---> 427f9ac9663d
 Step 2/10 : MAINTAINER Pradeep
 ---> Running in eed76128e5b1
 Removing intermediate container eed76128e5b1
 ---> 81cba679f259
 Step 3/10 : ENV PYTHONUNBUFFERED 1
 ---> Running in f36a150c75ca
 Removing intermediate container f36a150c75ca
 ---> 19b400033946
 Step 4/10 : COPY ./requirements.txt /requirements.txt
 ---> cdc01c22d14d
 Step 5/10 : RUN pip install -r /requirements.txt
 ---> Running in 9a149ac56dc9
 Collecting Django<2.2.0,>=2.1.3
 Downloading Django-2.1.15-py3-none-any.whl (7.3 MB)
 Collecting djangorestframework<3.10.0,>=3.9.0
 Downloading djangorestframework-3.9.4-py2.py3-none-any.whl (911 kB)
 Collecting pytz
 Downloading pytz-2021.3-py2.py3-none-any.whl (503 kB)
 Installing collected packages: pytz, djangorestframework, Django
 Successfully installed Django-2.1.15 djangorestframework-3.9.4 pytz-2021.3
 Removing intermediate container 9a149ac56dc9
 ---> 173b54cb8ef7
 Step 6/10 : RUN mkdir /app
 ---> Running in f57bcbd80b0c
 Removing intermediate container f57bcbd80b0c
 ---> 521b28d021be
 Step 7/10 : WORKDIR /app
 ---> Running in 902c1d6ad910
 Removing intermediate container 902c1d6ad910
 ---> 4d7bb493337e
 Step 8/10 : COPY ./app /app
 ---> 4bd171515fcc
 Step 9/10 : RUN adduser -D user
 ---> Running in d93592b78136
 Removing intermediate container d93592b78136
 ---> b48d5204605e
 Step 10/10 : USER user
 ---> Running in a29b40457e7e
 Removing intermediate container a29b40457e7e
 ---> b82aab704169
 Successfully built b82aab704169
 Successfully tagged drf-guide_app:latest

 # You can also verify this by
 pradeep@Latitude-5590:~/Desktop/DRF/DRF-Guide$ docker images
 REPOSITORY                                      TAG                 IMAGE ID       CREATED              SIZE
 drf-guide_app                                   latest              b82aab704169   About a minute ago   82.7MB
Creating Django Project:
Using Docker Compose, we executed commands on our image that contains the Django dependencies. Now we'll create the projects files that we need for our app. Let's create our project. Go to your terminal and execute ==> docker-compose run app sh -c "django-admin.py startproject app ."
 # Start Project
 deep@Latitude-5590:~/Desktop/DRF/DRF-Guide$ docker-compose run app sh -c "django-admin.py startproject app ."
Creating network "drf-guide_default" with the default driver
 # Start App
 deep@Latitude-5590:~/Desktop/DRF/DRF-Guide/app$ docker-compose run app sh -c "python manage.py startapp myapp"
Add
myapptoINSTALLED_APPSinsettings.pyINSTALLED_APPS = [ 'django.contrib.admin', 'django.contrib.auth', 'django.contrib.contenttypes', 'django.contrib.sessions', 'django.contrib.messages', 'django.contrib.staticfiles', 'myapp', ]Now that we have created our Django project, We can verify by running ==> " docker-compose run app sh -c "python manage.py runserver".
 deep@Latitude-5590:~/Desktop/DRF/DRF-Guide/app$ docker-compose run app sh -c "python manage.py runserver"
 Performing system checks...
 System check identified no issues (0 silenced).
 You have 15 unapplied migration(s). Your project may not work properly until you apply the migrations for app(s): admin, auth, contenttypes, sessions.
 Run 'python manage.py migrate' to apply them.
 October 13, 2021 - 16:55:13
 Django version 2.1.15, using settings 'app.settings'
 Starting development server at http://127.0.0.1:8000/
 Quit the server with CONTROL-C.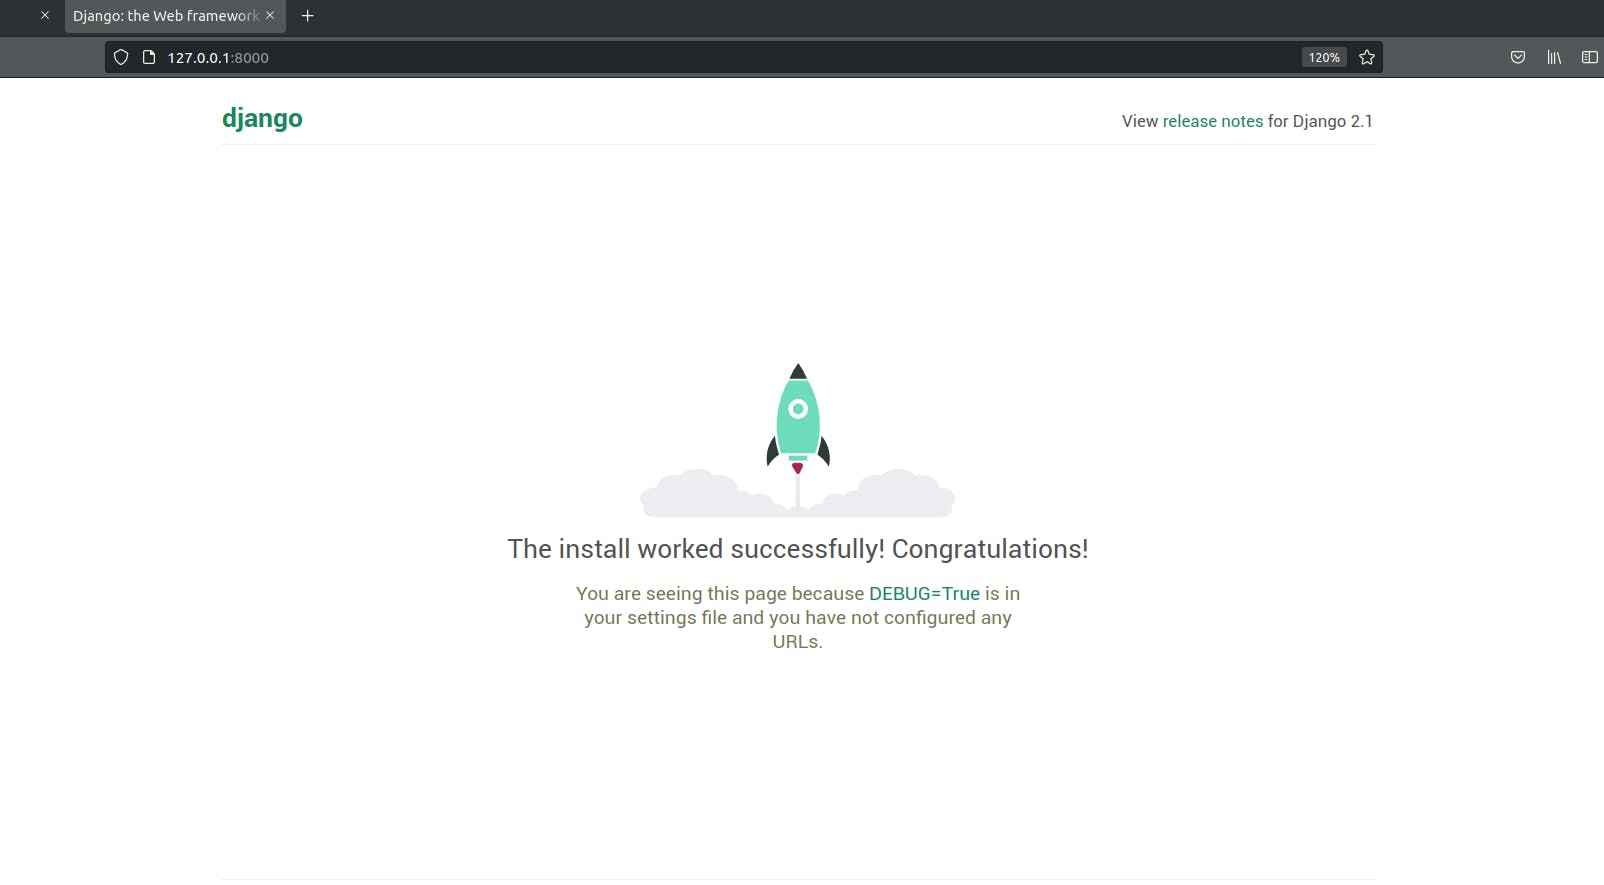
Now that our setup is successful, We can go ahead and commit that to git.
 pradeep@Latitude-5590:~/Desktop/DRF/DRF-Guide$ git add .
pradeep@Latitude-5590:~/Desktop/DRF/DRF-Guide$ git commit -am 'Setup Docker and Django Project'
[main 3f9bac5] Setup Docker and Django Project
8 files changed, 200 insertions(+)
create mode 100644 Dockerfile
create mode 100644 app/app/__init__.py
create mode 100644 app/app/settings.py
create mode 100644 app/app/urls.py
create mode 100644 app/app/wsgi.py
create mode 100755 app/manage.py
create mode 100644 docker-compose.yml
create mode 100644 requirements.txt
pradeep@Latitude-5590:~/Desktop/DRF/DRF-Guide$ git push origin main
Counting objects: 12, done.
Delta compression using up to 8 threads.
Compressing objects: 100% (11/11), done.
Writing objects: 100% (12/12), 3.12 KiB | 1.04 MiB/s, done.
Total 12 (delta 0), reused 0 (delta 0)
ceaa4f6..3f9bac5  main -> main
UPCOMING...
- Setup continuous integration & deployment (CI / CD) with Travis CLI and Github.
- Test-driven development and deployment following Pep 8 guidelines.
Thank you for Reading.